How to Create Custom Cross-stitch Patterns
Have you ever wanted to transform your own designs into custom cross-stitch patterns? Today I want to show you how I translate my designs into cross-stitch. I recently did this with the Fruits & Veggies sampler and I love how it turned out!

While there are plenty of cross-stitch converters, apps and Photoshop hacks (which work wonderfully if you're converting photographs), the technique I'm showing here consists of using a custom grid paper that matches your fabric's count. Think of the process as carving in the cross-stitch diagram until you get the perfect shape.
This curvy avocado is the perfect example to practice a custom cross-stitch pattern. Round shapes can be a bit tricky but not impossible!
How-to:
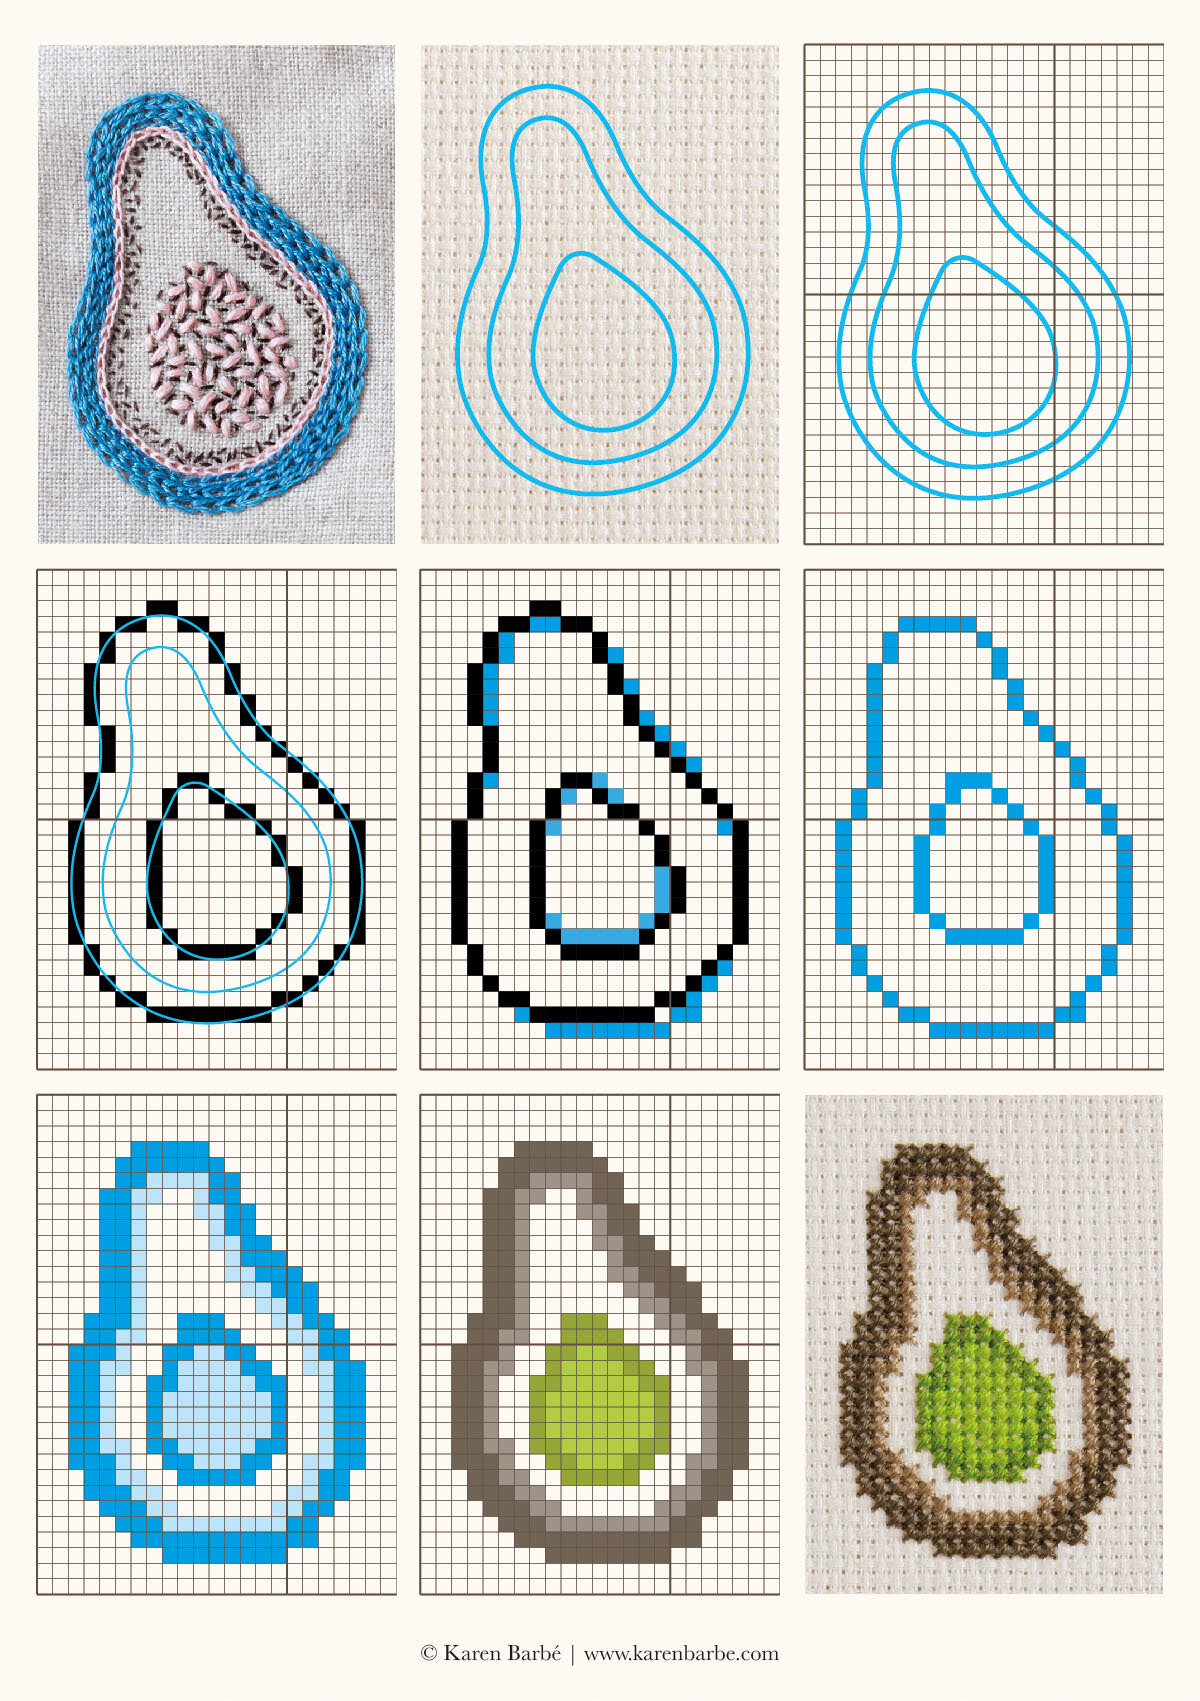
Top Row
Draw or print your design in the desired size
My original avocado measures 1.5 x 2.4 inches (4 x 6 cm). The embroidered version was worked with chain stitch and seed stitch. For translating the design into cross-stitch I only considered the main lines of the avocado leaving the texture aside.
Choose the fabric for cross-stitch
Whether you use aida cloth, evenweave linen or needlepoint canvas, the fabric count* you choose should take in account the final size, the level of complexity and how much of the motif's details you want to keep in the translation. A fabric with a higher count will allow you to retain much of the original detail and render less staggered curves whereas a low count fabric will produce a more abstract and geometric look.
*Fabric count: The number of squares or threads per linear inch.
Print the grid paper equivalent to the chosen fabric count
Download this grid paper file and print the page that matches your chosen fabric count. Print it at 100%. I chose a 16 count aida cloth so I used the equivalent grid paper.
Trace the line motif on the grid paper
Using a light box or against a window, trace the main lines of your design on the grid. Use a pen so the lines won't get erased with the following steps.
Middle row
Convert the lines to stitches
Using a pencil fill in the squares that are crossed by the main lines. This will give you a basic outline to start working with.
Fine-tune the main outline
This is the FUN part! Squint your eyes and identify the areas where the lines appear too broken or less fluid. Erase those stitches and again fill in the squares close to them. You may need to change one square at a time; keep squinting your eyes to check that the overall shape is looking smooth (well, as smooth as a cross-stitch design can be!) and similar to the source. REPEAT until you're happy with your design.
Bottom row
Complete the rest of the stitches
Once you get the main lines defined, complete the rest of the shape. You can thicken the lines by adding an inner row of stitches, fill in solid areas or include some details.
Colorize
Now that your design is ready, try different colors to enhance the shape and story behind it. Start practicing with small motifs and you'll soon get the grasp of it!
Share your stitches! Use #karenbarbe or tag me @karenbarbe on Instagram. I'd love to see what you achieve!